
The bigger picture: Why PKI for Intune and Cisco ISE?
Before diving into the builds, let me explain where we’re heading with this PKI infrastructure. This isn’t just about having certificates for the sake of it – we’re building the foundation for modern zero-trust network access. In the next article, we’ll add the Intune Certificate Connector to push certificates to cloud-managed Windows clients, which will then authenticate against Cisco ISE for network access. This is a common way of doing it, but there are other alternatives of course. For example SCEPman (from Glueck Kanja) which can build on Azure Key Vaults, or Microsoft Cloud PKI which can simplify things.
For this scenario though, the flow will look like this:
- Intune-managed device requests a certificate through the Intune Certificate Connector
- NDES server validates the request and gets the certificate from our CA
- Certificate is deployed to the device via Intune MDM
- Device uses this certificate to authenticate to Wi-Fi/VPN via Cisco ISE
- Cisco ISE validates the certificate against our CA and grants network access
Why separate servers for CA and NDES?
I’m using separate servers for the Certificate Authority (CA) and Network Device Enrollment Service (NDES) instead of throwing everything on the domain controller. This isn’t just a best practice – it’s a requirement for the Intune Certificate Connector and follows critical security guidelines:
Microsoft Requirements:
- The Certificate Connector for Microsoft Intune is not supported on the same server as your issuing CA
- NDES must not be installed on a domain controller
- NDES must not be installed on the server that hosts the Enterprise CA (security risk when CA services internet requests)
Security isolation: The CA holds the keys to your kingdom (literally). Compromising a CA means compromising every certificate it’s issued. Keeping it separate limits the attack surface.
Intune integration: NDES will host the Intune Certificate Connector, which needs internet connectivity to communicate with Microsoft’s cloud services. Your CA should never be directly exposed to the internet.
Performance: Certificate operations, especially NDES with SCEP challenges from hundreds of Intune devices, can be resource-intensive. Separating roles prevents impact on critical domain services.
Lifecycle management: The Intune Certificate Connector requires frequent updates (Microsoft releases updates regularly). Having NDES separate means you can update it without touching your CA.
Summary of server requirements:
- CA Server (HW-CA01): Domain-joined, Enterprise edition, NOT a domain controller
- NDES Server (HW-NDES01): Domain-joined, same forest as CA, NOT a domain controller, NOT the CA server
- Both servers must be in the same Active Directory forest
Creating the Certificate Authority Server
Let’s start with our new Windows Server 2025 CA. I’m going with Server 2025 here since it’s the latest and greatest, and Microsoft has added some nice improvements to the certificate services.
VM Creation and Configuration
# Create VHD for the CA server (30GB for Server 2025's larger footprint)
New-VHD -Path "C:\Hyper-V\VHDs\HAWKWEAVE-CA01.vhdx" -SizeBytes 30GB -Dynamic

# Create the Certificate Authority VM
New-VM -Name "HAWKWEAVE-CA01" `
    -MemoryStartupBytes 2GB `
    -BootDevice VHD `
    -VHDPath "C:\Hyper-V\VHDs\HAWKWEAVE-CA01.vhdx" `
    -Path "C:\Hyper-V\VMs\" `
    -Generation 2 `
    -Switch "LabNet-Lan"

# Configure CA VM settings - CA doesn't need much memory
Set-VM -Name "HAWKWEAVE-CA01" `
    -ProcessorCount 2 `
    -DynamicMemory `
    -MemoryMinimumBytes 1GB `
    -MemoryMaximumBytes 4GB `
    -AutomaticCheckpointsEnabled $false

# Enable security features
Set-VMFirmware -VMName "HAWKWEAVE-CA01" -EnableSecureBoot On
Set-VMKeyProtector -VMName "HAWKWEAVE-CA01" -NewLocalKeyProtector
Enable-VMTPM -VMName "HAWKWEAVE-CA01"

# Add DVD drive and mount Windows Server 2025 ISO
Add-VMDvdDrive -VMName "HAWKWEAVE-CA01" `
    -Path "C:\ISO\Server 2025\en-us_windows_server_2025_preview_x64_dvd.iso"

# Set boot order to DVD first
Set-VMFirmware -VMName "HAWKWEAVE-CA01" `
    -BootOrder (Get-VMDvdDrive -VMName "HAWKWEAVE-CA01"), `
               (Get-VMHardDiskDrive -VMName "HAWKWEAVE-CA01")

# Enable Integration Services
Enable-VMIntegrationService -VMName "HAWKWEAVE-CA01" -Name "Guest Service Interface"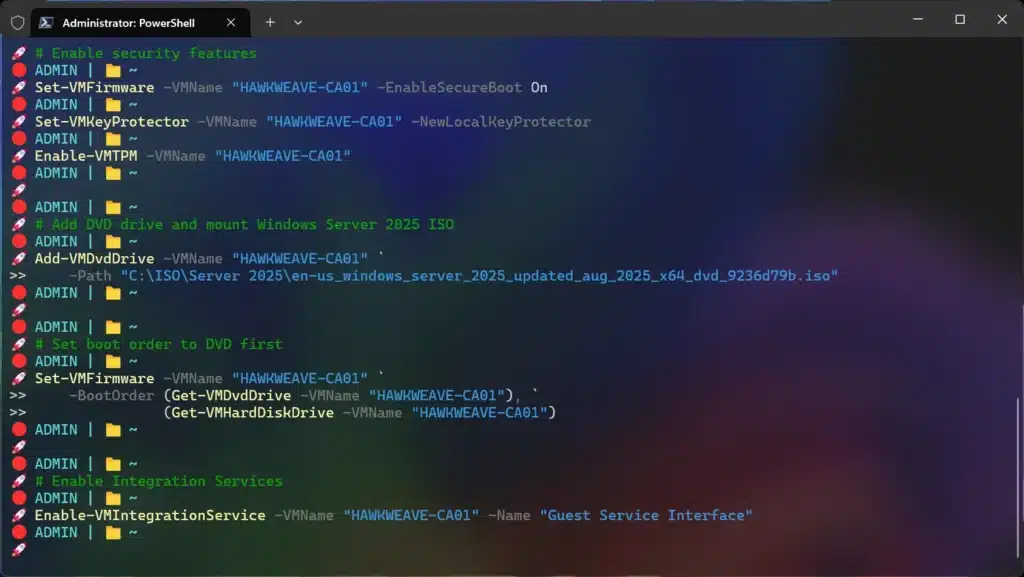
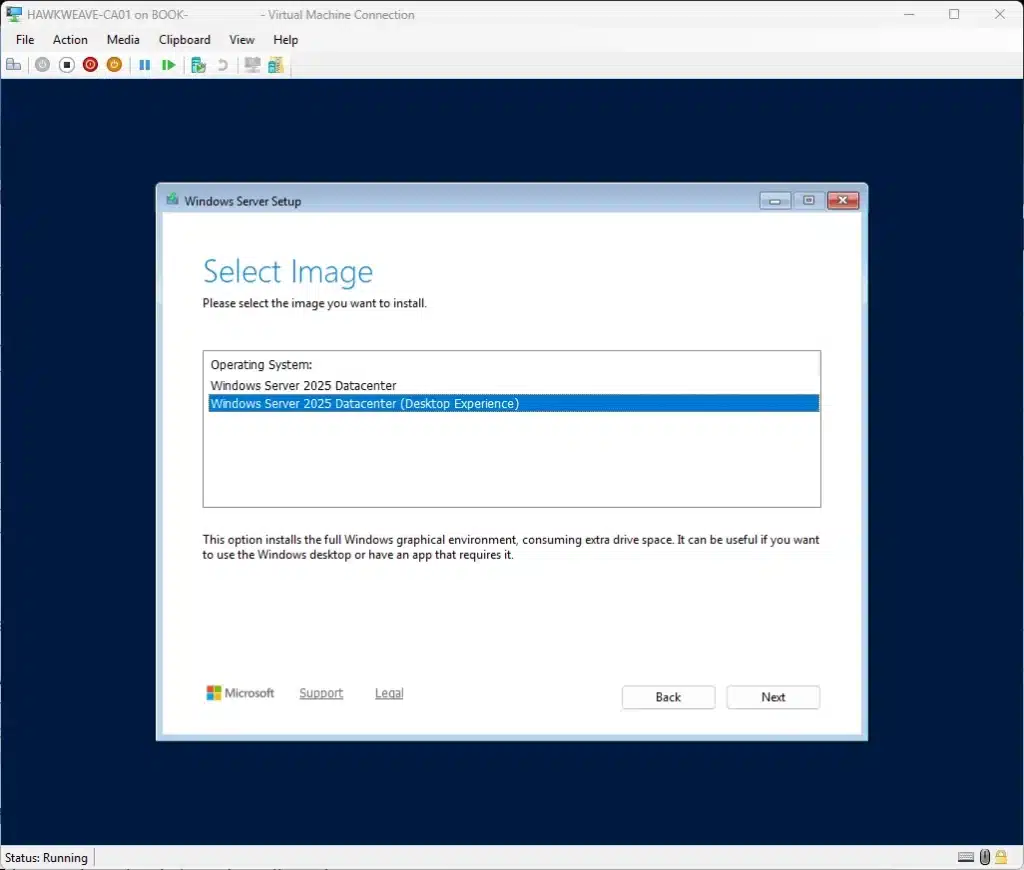
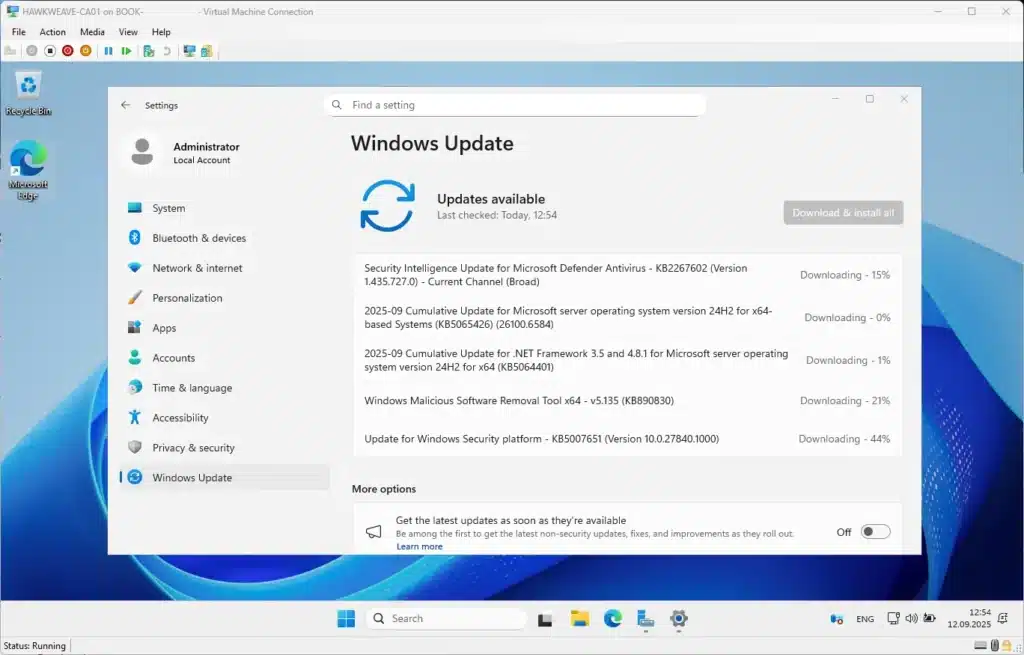
Windows Server 2025 Installation
The installation process for Server 2025 is virtually identical to 2022, but there are a few things worth noting:
- Edition selection: I went with Datacenter (Desktop Experience) again. For a CA, you definitely want the GUI for certificate management.
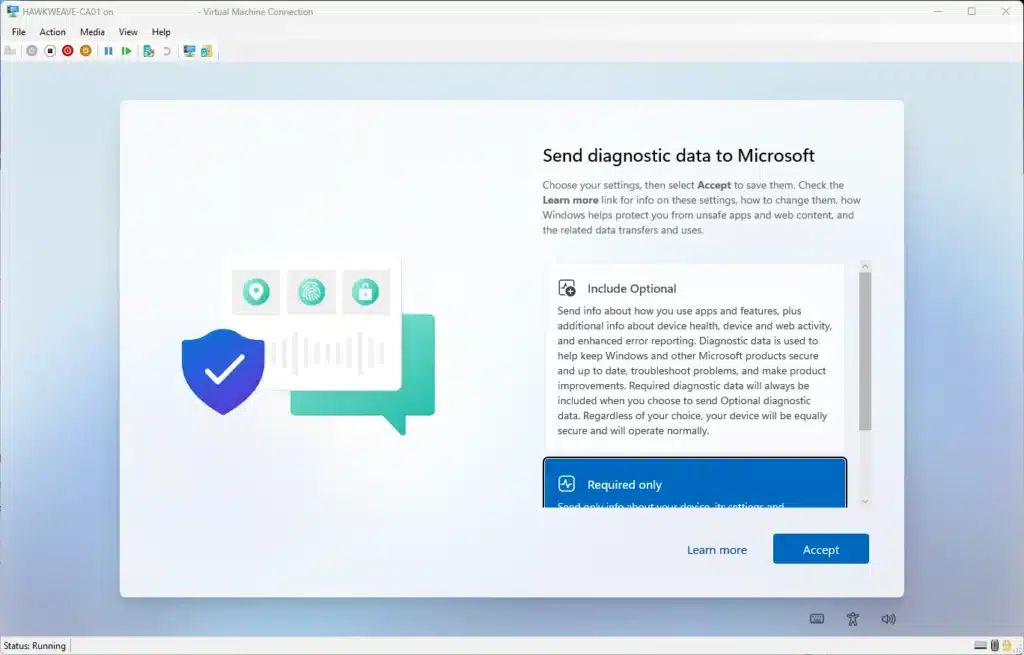
- Initial configuration: After installation, the OOBE is a lot quicker to go through than in previous Server Versions.
- Disk space requirements: Server 2025 requires significantly more disk space than Server 2022. After initial installation and the first round of cumulative updates, expect it to use 20+ GB. With additional roles like NDES installed, it can approach 30 GB. Consider running Disk Cleanup to remove Windows Update files if space becomes tight, or allocate at least 30-35 GB for VHDs to be safe.
Post-Installation Configuration
Once Windows Server 2025 is up and running, let’s get it configured:
# Rename the server
Rename-Computer -NewName "HW-CA01" -Restart

# After reboot, configure networking
New-NetIPAddress -InterfaceAlias "Ethernet" `
    -IPAddress "10.50.50.20" `
    -PrefixLength 24 `
    -DefaultGateway "10.50.50.1"

Set-DnsClientServerAddress -InterfaceAlias "Ethernet" `
    -ServerAddresses "10.50.50.10"

# Join the domain
Add-Computer -DomainName "core.hawkweave.com" `
    -Credential (Get-Credential CORE\hwadmin) `
    -OUPath "OU=Servers,OU=Hawkweave,DC=core,DC=hawkweave,DC=com" `
    -Restart

Installing the Certificate Authority Role
After the domain join reboot, it’s time to install the CA role. I’m setting up an Enterprise Root CA for lab simplicity (you’d normally have an offline root in production).
# Install only the Certification Authority role service with management tools
# This installs just what we need - no extra role services
Install-WindowsFeature -Name AD-Certificate -IncludeManagementTools

# That's it! This gives us the CA role and the management snap-ins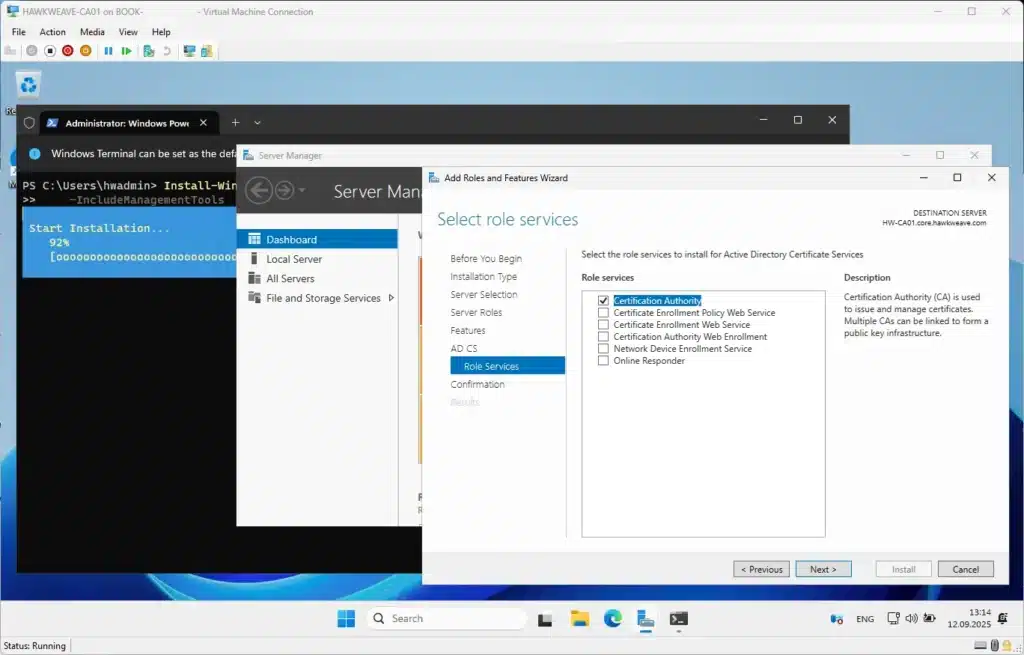

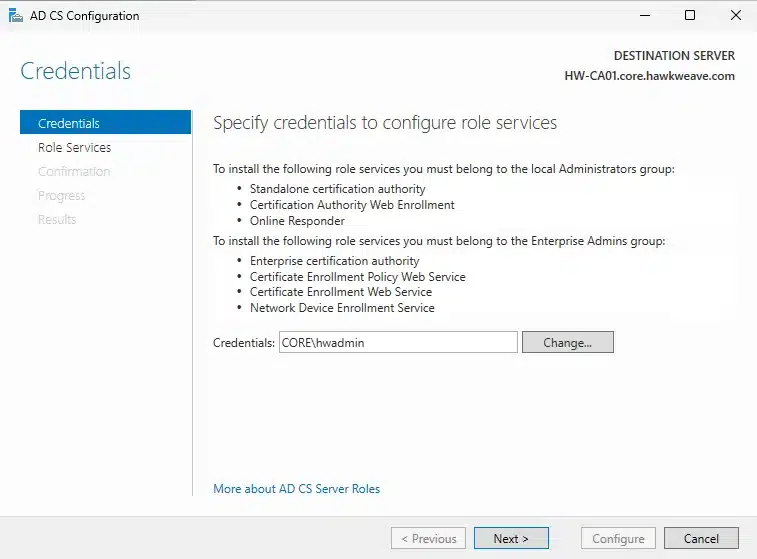
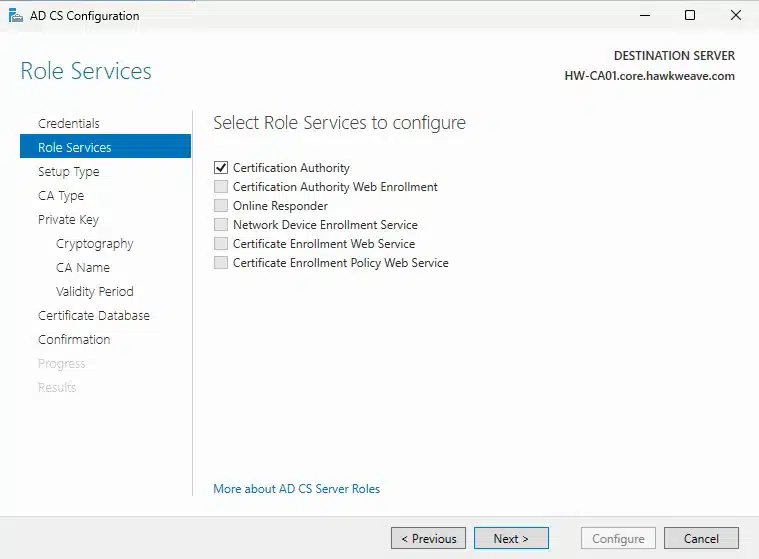
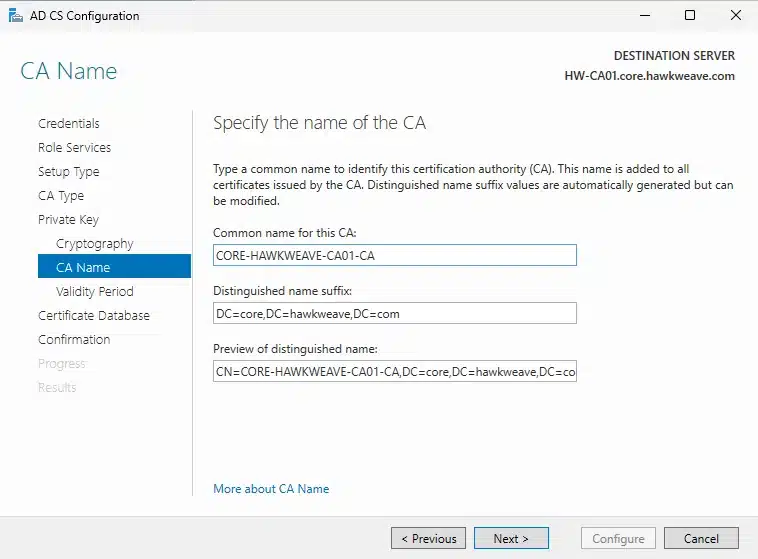
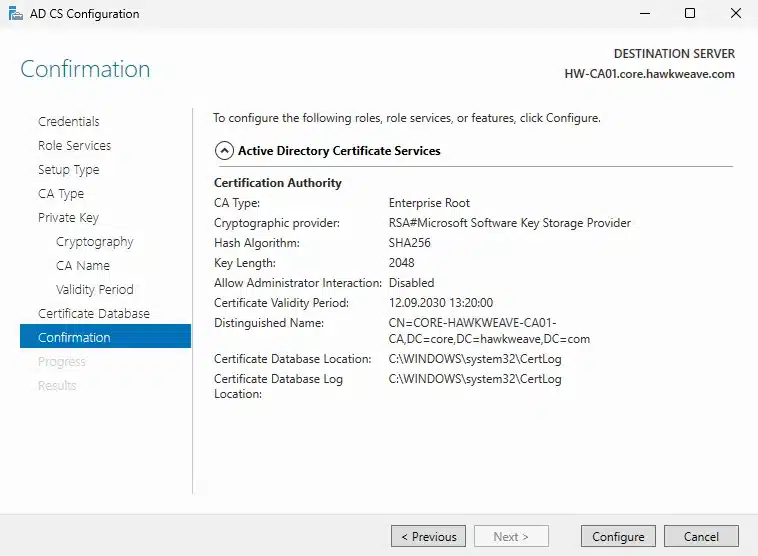
Configuring the Enterprise Root CA
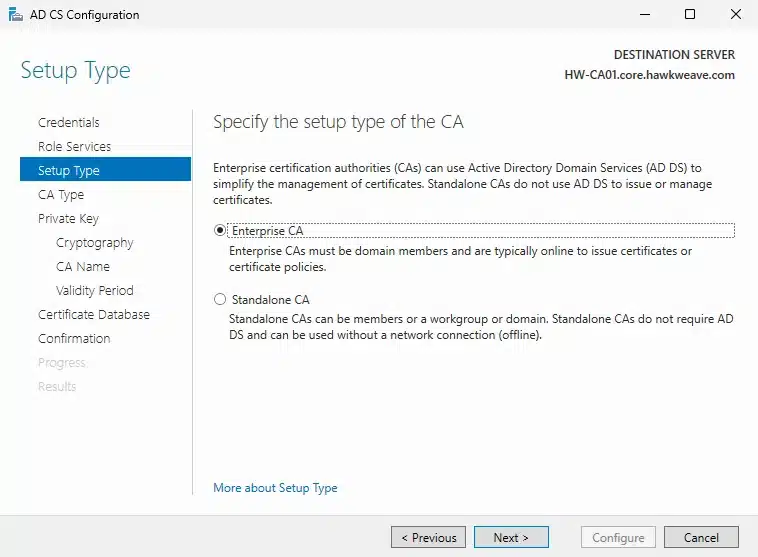
After installing the role, I ran the AD CS Configuration wizard from Server Manager. Here’s what I selected:
- Role Service: Certification Authority
- Setup Type: Enterprise CA (integrates with Active Directory)
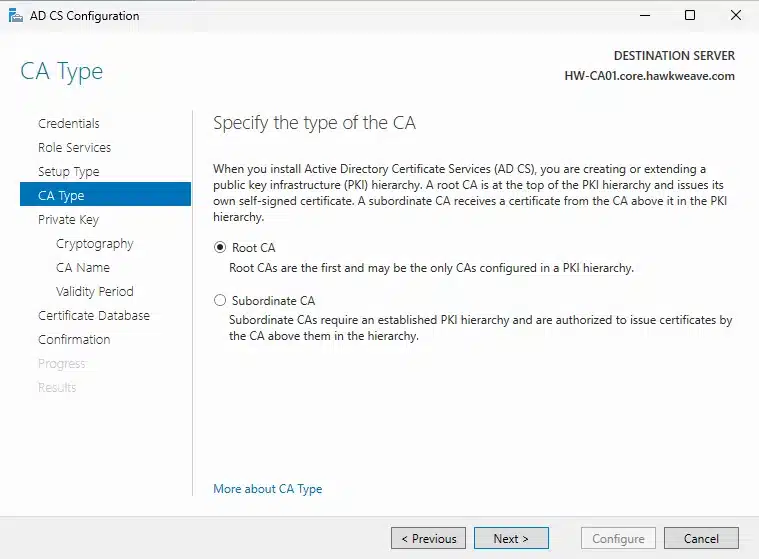
- CA Type: Root CA (since this is our first CA in the forest)
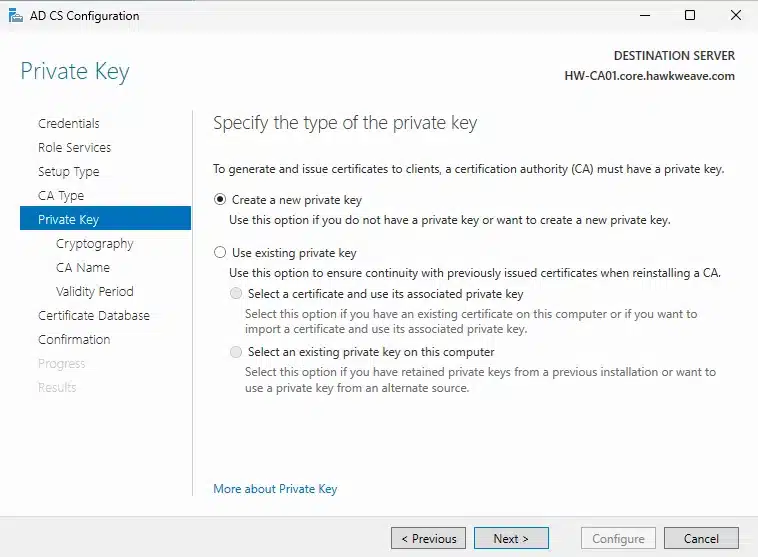
- Private Key: Create a new private key
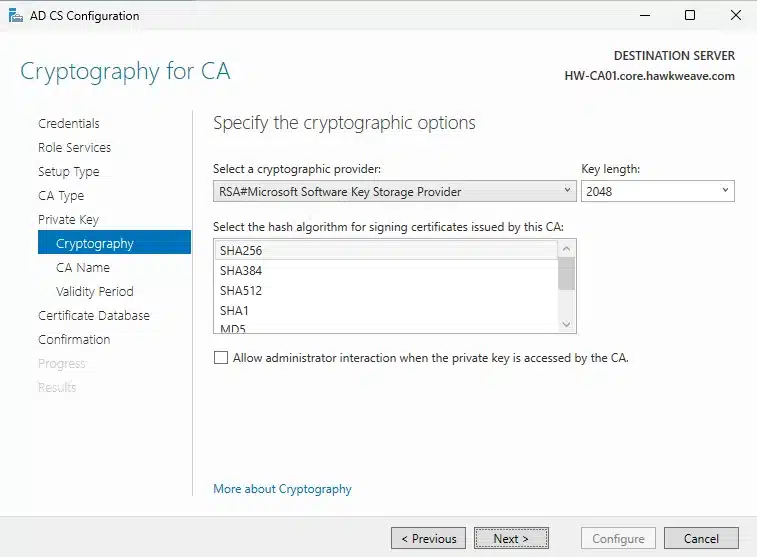
- Cryptography:
- Provider: RSA#Microsoft Software Key Storage Provider
- Key Length: 2048 bits (sufficient for a lab)
- Hash Algorithm: SHA256
- CA Name: CORE-HAWKWEAVE-CA01-CA (I changed this from the default to be more descriptive)
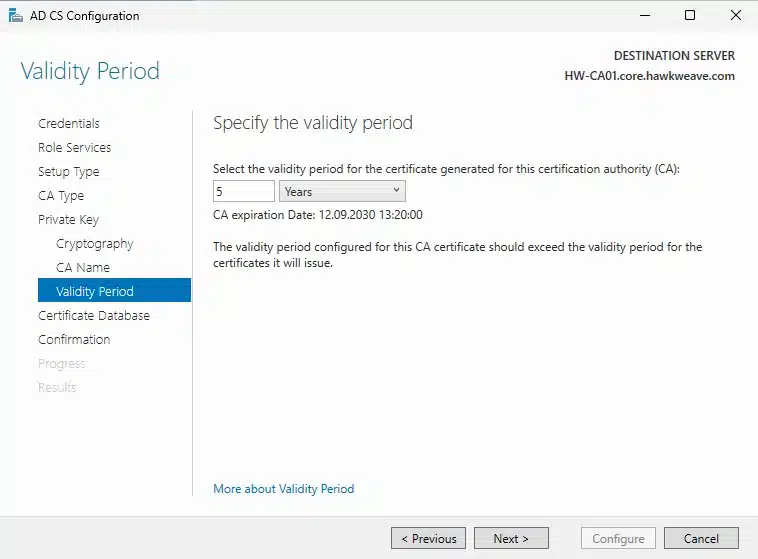
- Validity Period: 5 years (reasonable for a lab environment)
- Database Locations: Kept the defaults
- Database: C:\Windows\system32\CertLog
- Database log: C:\Windows\system32\CertLog
You can also configure this via PowerShell if you prefer automation:
# Configure the CA using PowerShell (equivalent to the GUI choices above)
Install-AdcsCertificationAuthority `
    -CAType EnterpriseRootCa `
    -CryptoProviderName "RSA#Microsoft Software Key Storage Provider" `
    -KeyLength 2048 `
    -HashAlgorithmName SHA256 `
    -CACommonName "CORE-HAWKWEAVE-CA01-CA" `
    -CADistinguishedNameSuffix "DC=core,DC=hawkweave,DC=com" `
    -ValidityPeriod Years `
    -ValidityPeriodUnits 5 `
    -DatabaseDirectory "C:\Windows\system32\CertLog" `
    -LogDirectory "C:\Windows\system32\CertLog" `
    -Force

# The CA is now ready and will start issuing certificates!
Creating the NDES Service Account
Before setting up the NDES server, we need to create a dedicated service account on the Domain Controller. This account will be used by both the NDES application pool and must have specific permissions.
On the Domain Controller (HW-DC01):
# Create the NDES service account
$ndesPassword = ConvertTo-SecureString "YourComplexPassword123!" -AsPlainText -Force

New-ADUser -Name "NDES Service" `
    -SamAccountName "svc_ndes" `
    -UserPrincipalName "svc_ndes@core.hawkweave.com" `
    -Path "OU=Service Accounts,OU=Hawkweave,DC=core,DC=hawkweave,DC=com" `
    -AccountPassword $ndesPassword `
    -Enabled $true `
    -PasswordNeverExpires $true `
    -CannotChangePassword $true `
    -Description "Service account for NDES and Intune Certificate Connector" `
    -ServicePrincipalNames @("http/HW-NDES01", "http/HW-NDES01.core.hawkweave.com")

# Note: We'll add this account to the local IIS_IUSRS group on the NDES server later
# Grant "Log on as a service" right will be configured during NDES setup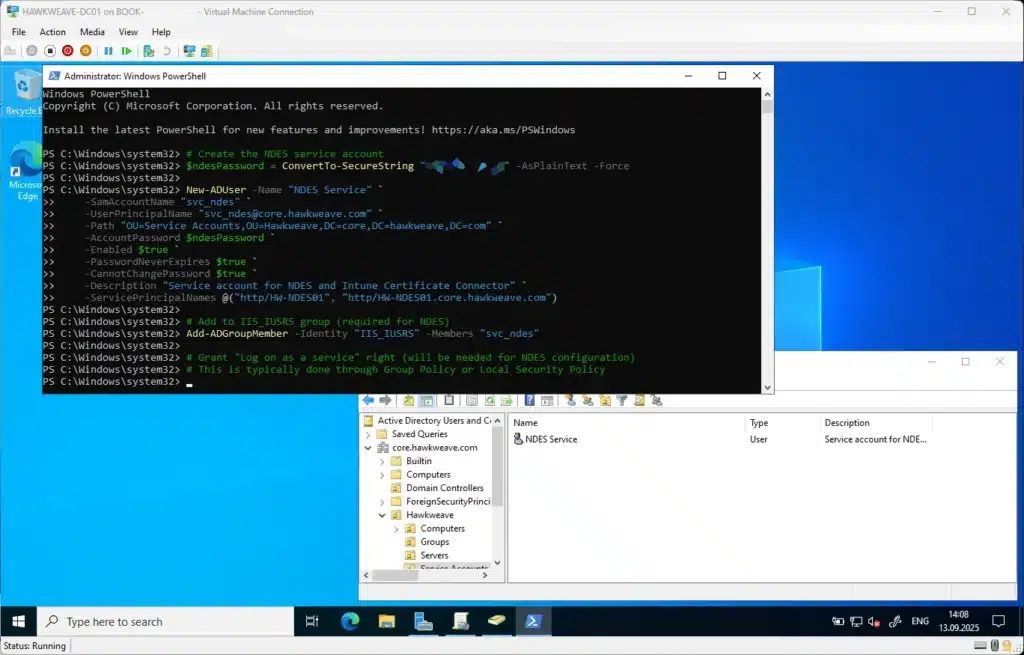
Granting CA Permissions to NDES Service Account
For Intune to be able to revoke certificates that are no longer required, you must grant permissions in the Certificate Authority. On the CA server:
# Open Certification Authority console
# Right-click the CA name (CORE-HAWKWEAVE-CA01-CA) and select Properties
# Go to Security tab
# Add CORE\svc_ndes account with:
# - Issue and Manage Certificates (for certificate issuance and revocation)
# - Request Certificates (for normal operation)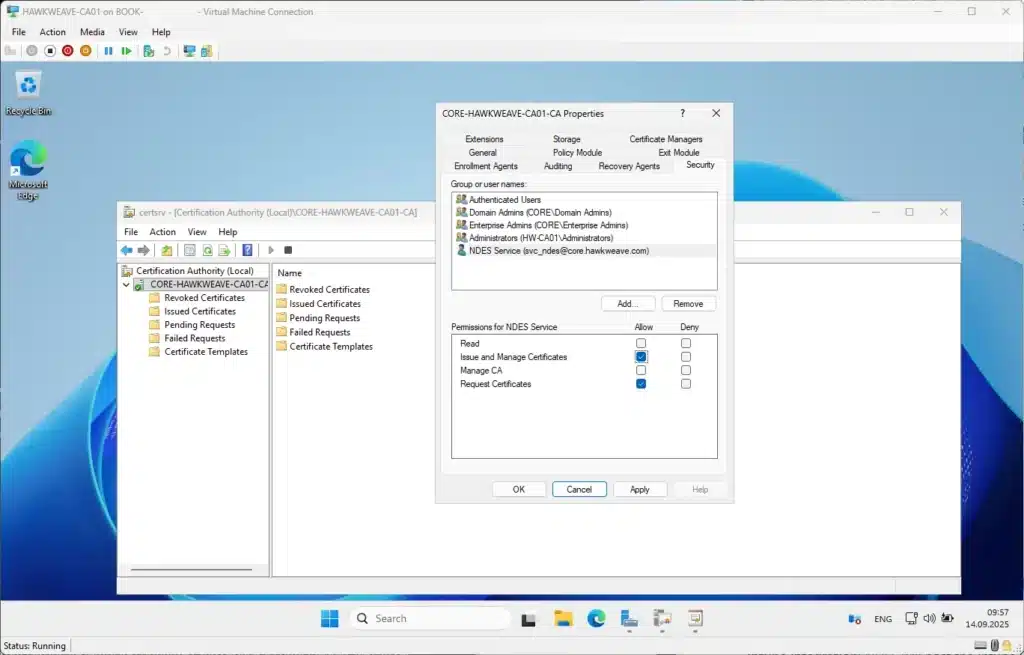
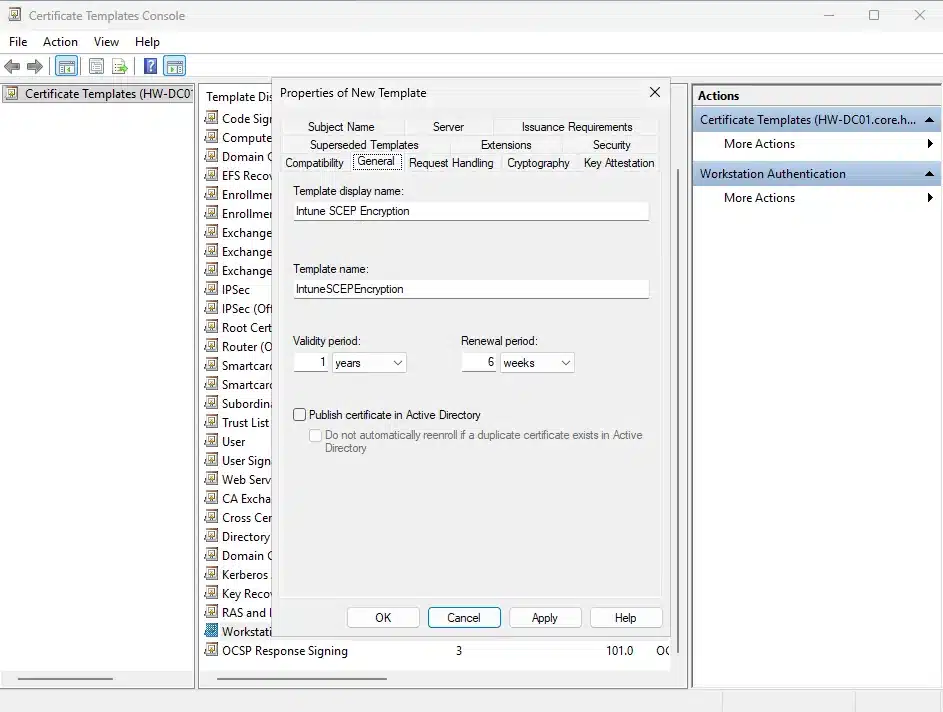
Creating the SCEP Certificate Template
Before setting up NDES, we also need to create a v2 Certificate Template (with Windows 2003 compatibility) for use as the SCEP certificate template. I’ll duplicate the Workstation Authentication template as it has the required Schema Version 2.
On the CA server (HW-CA01), open the Certification Authority console:
- Right-click Certificate Templates and select Manage
- Find and right-click “Workstation Authentication” template and select Duplicate Template
- Configure the new template with these settings:
General Tab:
- Template display name:
Intune SCEP Encryption - Template name:
IntuneSCEPEncryption - Validity period: 1 year
- Renewal period: 6 weeks
- Uncheck “Publish certificate in Active Directory”
Compatibility Tab:
- Certification Authority: Windows Server 2003
- Certificate recipient: Windows XP / Server 2003
Subject Name Tab:
- Select “Supply in the request” (critical – Intune policy module for NDES enforces security)
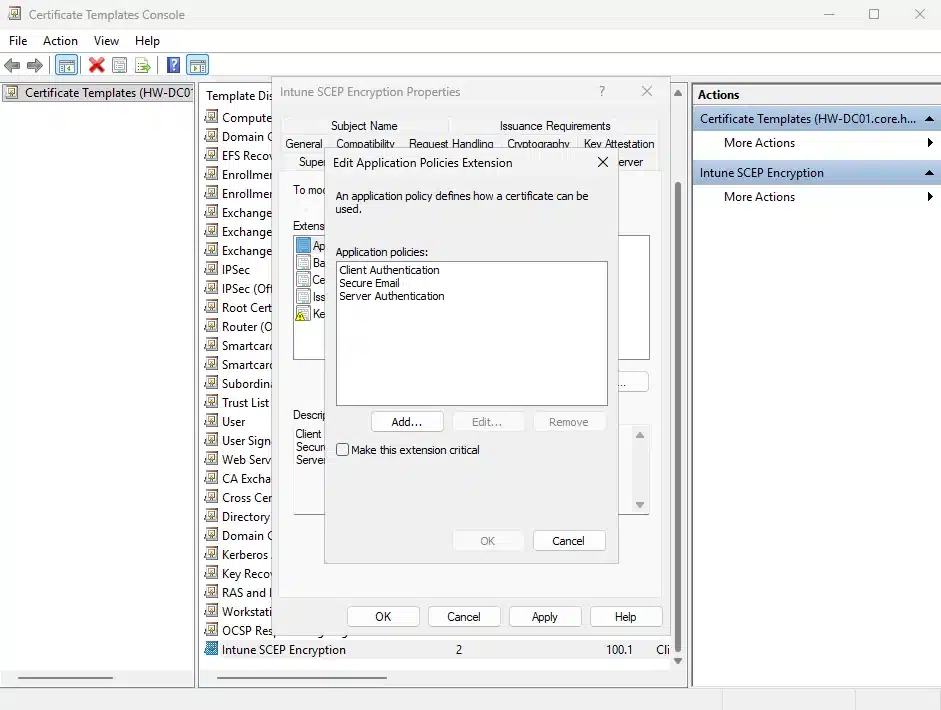
Extensions Tab:
- Application Policies: Ensure “Client Authentication” is present (required for authentication)
- For iOS/iPadOS and macOS: Edit Key Usage and ensure “Signature is proof of origin” is NOT selected
- Note the Key Usage values (Digital signature, Key encipherment) for later Intune configuration
Request Handling Tab:
- Configure as needed for your environment – both “Encryption” or “Signature and Encryption” are fine
- Typically leave defaults unless you have specific requirements
Issuance Requirements Tab:
- Configure as needed (typically no changes required for lab environment)
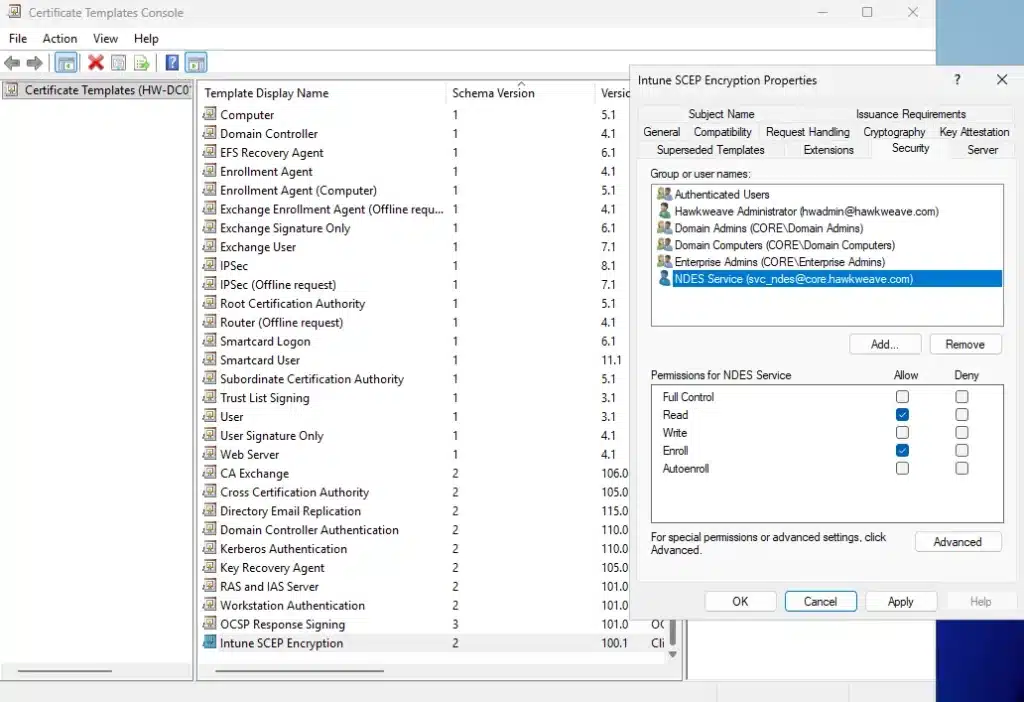
Security Tab:
- Add CORE\svc_ndes with Read and Enroll permissions
- Add Domain Computers with Read and Enroll permissions (for device certificates)
- Add your Intune administrator accounts with Read permission (to browse templates when creating SCEP profiles)
- Click OK to save the template
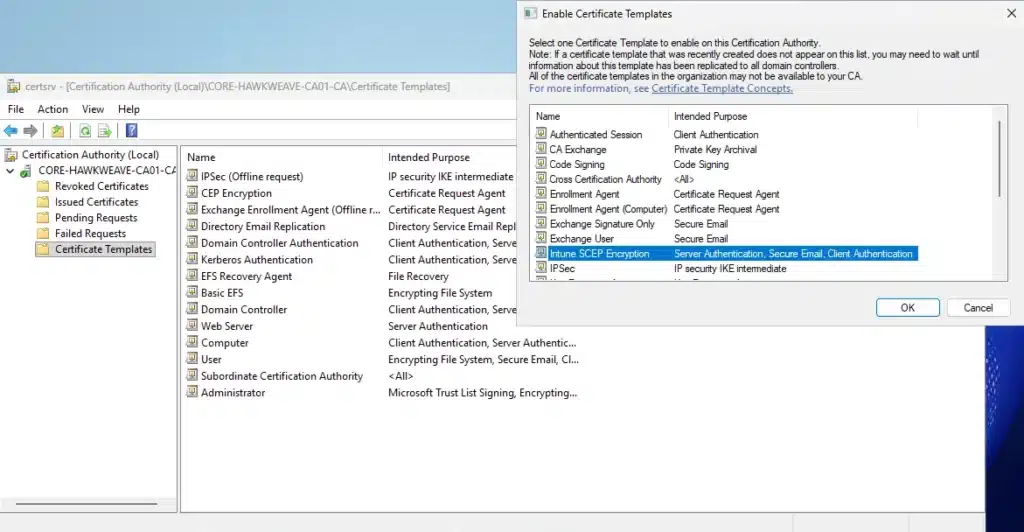
Issue the template:
- Right-click Certificate Templates → New → Certificate Template to Issue → Select
Intune SCEP Encryption→ OK
Creating the NDES Server
Now that we have our certificate template configured and service account created, we can set up the NDES server, which will handle SCEP requests from Intune-managed devices.
VM Creation for NDES
# Create VHD for the NDES server (30GB for Server 2025's larger footprint)
New-VHD -Path "C:\Hyper-V\VHDs\HAWKWEAVE-NDES01.vhdx" -SizeBytes 30GB -Dynamic

# Create the NDES VM
New-VM -Name "HAWKWEAVE-NDES01" `
    -MemoryStartupBytes 2GB `
    -BootDevice VHD `
    -VHDPath "C:\Hyper-V\VHDs\HAWKWEAVE-NDES01.vhdx" `
    -Path "C:\Hyper-V\VMs\" `
    -Generation 2 `
    -Switch "LabNet-Lan"

# Configure NDES VM settings
Set-VM -Name "HAWKWEAVE-NDES01" `
    -ProcessorCount 2 `
    -DynamicMemory `
    -MemoryMinimumBytes 1GB `
    -MemoryMaximumBytes 4GB `
    -AutomaticCheckpointsEnabled $false

# Security features
Set-VMFirmware -VMName "HAWKWEAVE-NDES01" -EnableSecureBoot On
Set-VMKeyProtector -VMName "HAWKWEAVE-NDES01" -NewLocalKeyProtector
Enable-VMTPM -VMName "HAWKWEAVE-NDES01"

# Add DVD and mount Server 2025 ISO
Add-VMDvdDrive -VMName "HAWKWEAVE-NDES01" `
    -Path "C:\ISO\Server 2025\en-us_windows_server_2025_preview_x64_dvd.iso"

# Boot order
Set-VMFirmware -VMName "HAWKWEAVE-NDES01" `
    -BootOrder (Get-VMDvdDrive -VMName "HAWKWEAVE-NDES01"), `
               (Get-VMHardDiskDrive -VMName "HAWKWEAVE-NDES01")

# Integration Services
Enable-VMIntegrationService -VMName "HAWKWEAVE-NDES01" -Name "Guest Service Interface"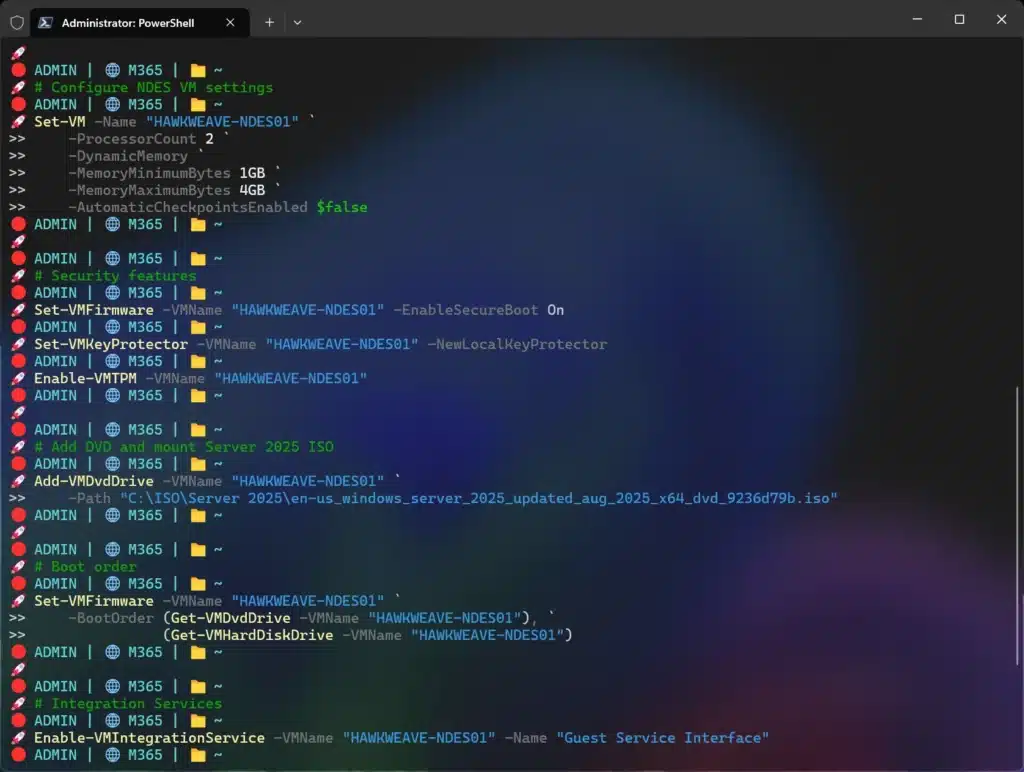

NDES Post-Installation Configuration
After installing Windows Server 2025:
# Rename the server
Rename-Computer -NewName "HW-NDES01" -Restart

# Configure networking
New-NetIPAddress -InterfaceAlias "Ethernet" `
    -IPAddress "10.50.50.30" `
    -PrefixLength 24 `
    -DefaultGateway "10.50.50.1"

Set-DnsClientServerAddress -InterfaceAlias "Ethernet" `
    -ServerAddresses "10.50.50.10"

# Join domain
Add-Computer -DomainName "core.hawkweave.com" `
    -Credential (Get-Credential CORE\hwadmin) `
    -OUPath "OU=Servers,OU=Hawkweave,DC=core,DC=hawkweave,DC=com" `
    -Restart
Disabling Internet Explorer Enhanced Security Configuration
Internet Explorer Enhanced Security Configuration must be disabled on the NDES server for the NDES and Intune Certificate Connector to function properly:
Via Server Manager (GUI):
- Open Server Manager
- Click on Local Server in the left pane
- Find IE Enhanced Security Configuration (it shows as “On”)
- Click the “On” link
- Set both options to Off:
- Administrators: Off
- Users: Off
- Click OK
Via PowerShell:
# Disable IE Enhanced Security Configuration for Administrators and Users
$AdminKey = "HKLM:\SOFTWARE\Microsoft\Active Setup\Installed Components\{A509B1A7-37EF-4b3f-8CFC-4F3A74704073}"
$UserKey = "HKLM:\SOFTWARE\Microsoft\Active Setup\Installed Components\{A509B1A8-37EF-4b3f-8CFC-4F3A74704073}"

Set-ItemProperty -Path $AdminKey -Name "IsInstalled" -Value 0
Set-ItemProperty -Path $UserKey -Name "IsInstalled" -Value 0

# Restart Internet Explorer or Edge for changes to take effect
Stop-Process -Name Explorer -Force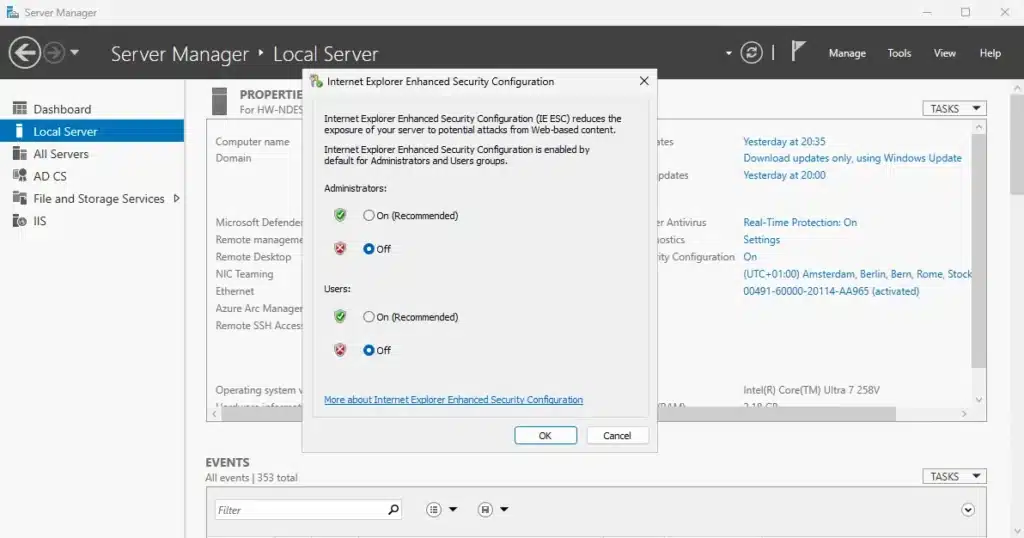
Installing NDES Role and Dependencies
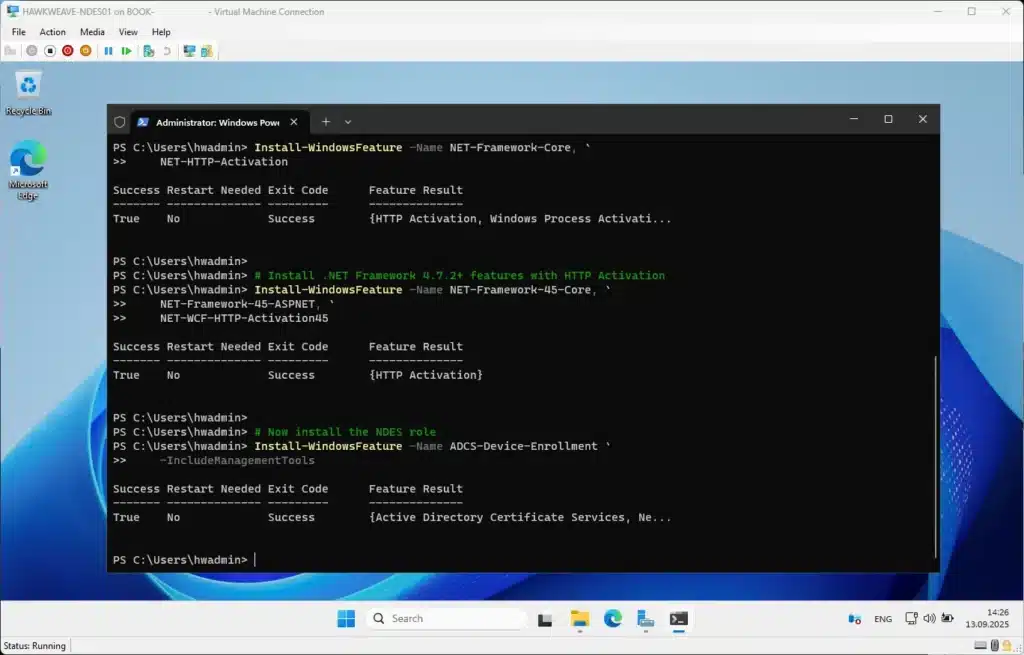
Installing NDES requires careful attention to dependencies, especially the .NET HTTP Activation features that are found in the Features section, not among the Roles. Here’s the complete installation process:
# Install IIS with all required features
Install-WindowsFeature -Name Web-Server `
-IncludeManagementTools
# Install specific IIS features required for NDES
Install-WindowsFeature -Name Web-Filtering, `
Web-Asp-Net, `
Web-Asp-Net45, `
Web-Metabase, `
Web-WMI
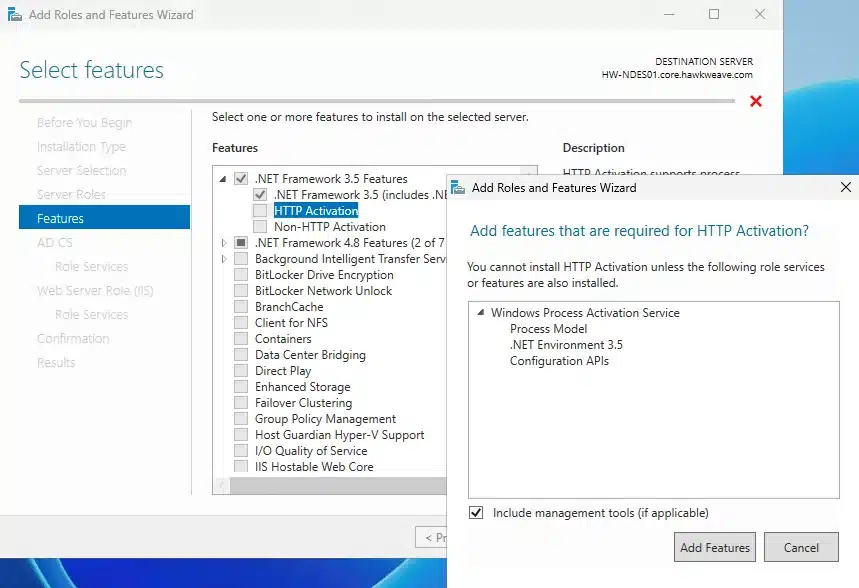
# Install .NET Framework 3.5 with HTTP Activation
# This is critical and often missed!
Install-WindowsFeature -Name NET-Framework-Core, `
NET-HTTP-Activation
# Install .NET Framework 4.7.2+ features with HTTP Activation
Install-WindowsFeature -Name NET-Framework-45-Core, `
NET-Framework-45-ASPNET, `
NET-WCF-HTTP-Activation45
# Now install the NDES role
Install-WindowsFeature -Name ADCS-Device-Enrollment `
-IncludeManagementTools
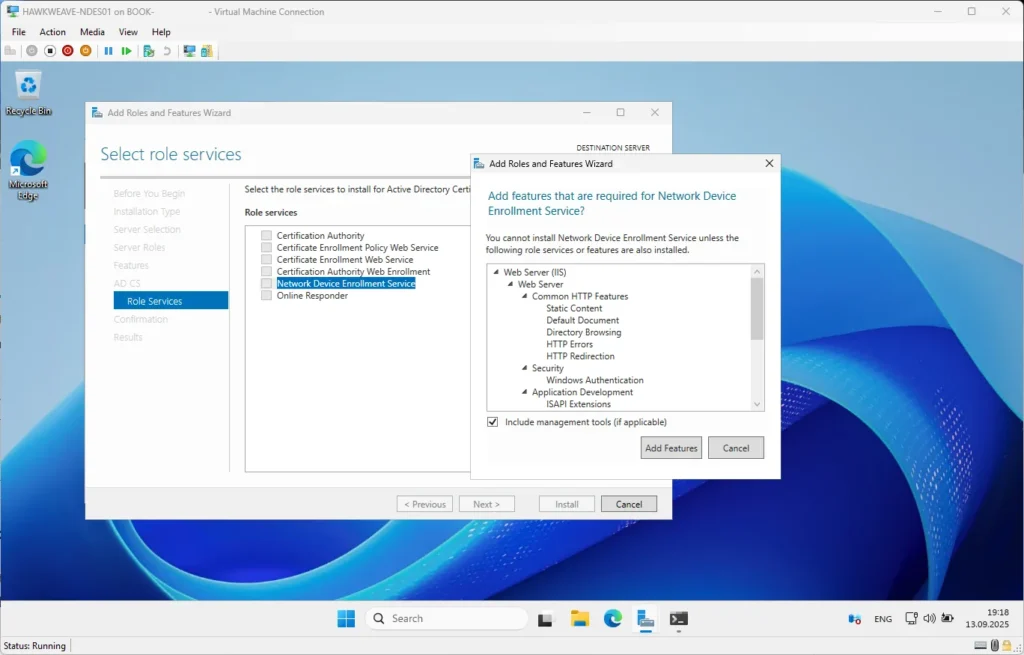
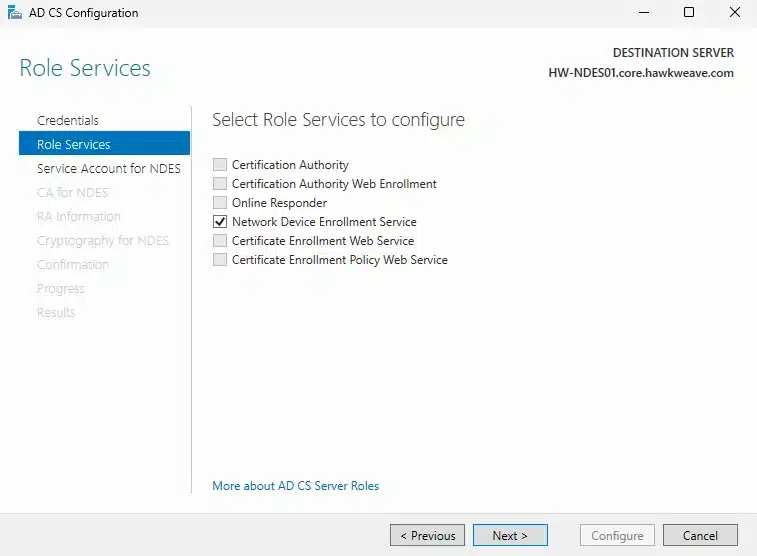
Or via the GUI (Add Roles and Features Wizard):
- In the Wizard, select Active Directory Certificate Services to gain access to the AD CS Role Services
- Select Network Device Enrollment Service, uncheck Certification Authority, and proceed
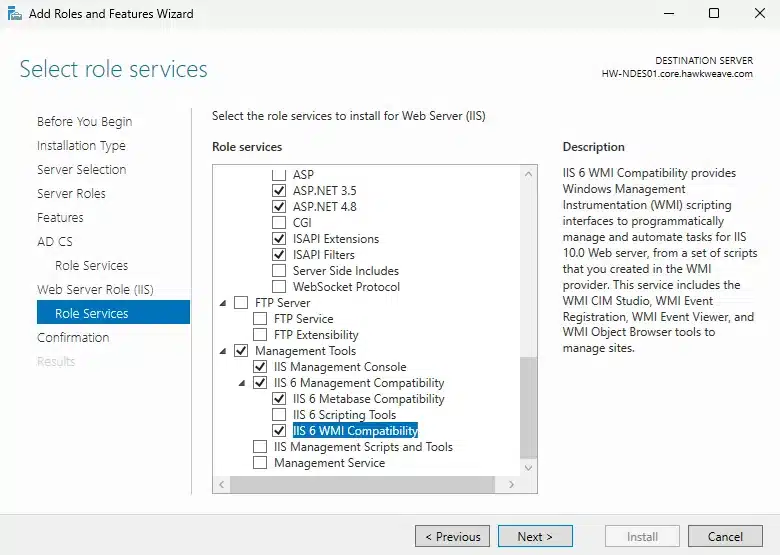
- Important: When NDES is added, the wizard also installs IIS. Confirm these configurations:
- Web Server > Security > Request Filtering
- Web Server > Application Development > ASP.NET 3.5
- Installing ASP.NET 3.5 installs .NET Framework 3.5
- Install both core .NET Framework 3.5 feature and HTTP Activation (in Features)
- Web Server > Application Development > ASP.NET 4.5 (or 4.7.2)
- Installing ASP.NET 4.5+ installs .NET Framework 4.5+
- Install core .NET Framework 4.5+ feature, ASP.NET 4.5+, and WCF Services > HTTP Activation (in Features)
- Management Tools > IIS 6 Management Compatibility > IIS 6 Metabase Compatibility
- Management Tools > IIS 6 Management Compatibility > IIS 6 WMI Compatibility
Tip: In Installation progress, don’t select Close. Instead, select the Configure Active Directory Certificate Services on the destination server link. The AD CS Configuration wizard opens, which you’ll use for NDES configuration. After AD CS Configuration opens, you can close the Add Roles and Features wizard.
Adding Service Account to Local Groups
Before configuring NDES, add the service account to the local IIS_IUSRS group on the NDES server:
# Run this ON THE NDES SERVER (HW-NDES01), not on the domain controller!
Add-LocalGroupMember -Group "IIS_IUSRS" -Member "CORE\svc_ndes"

# Verify the account was added
Get-LocalGroupMember -Group "IIS_IUSRS"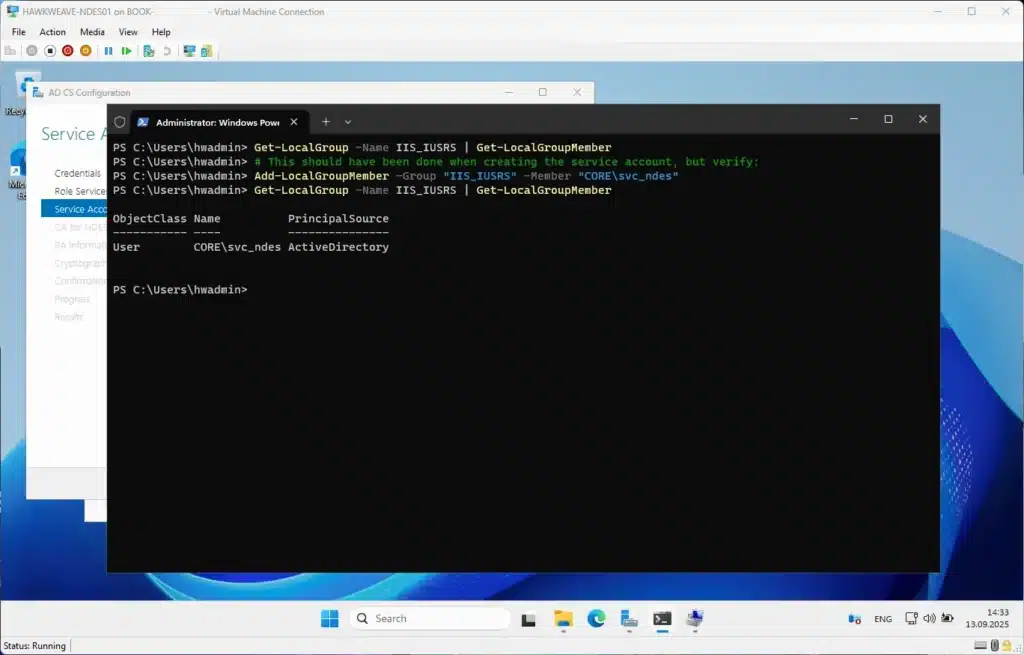
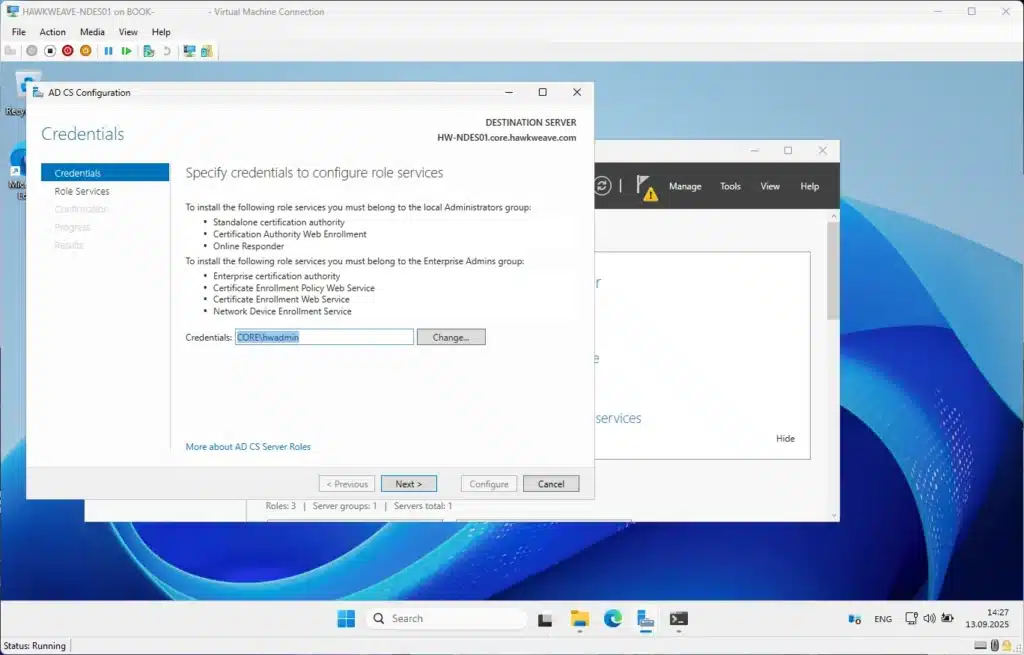
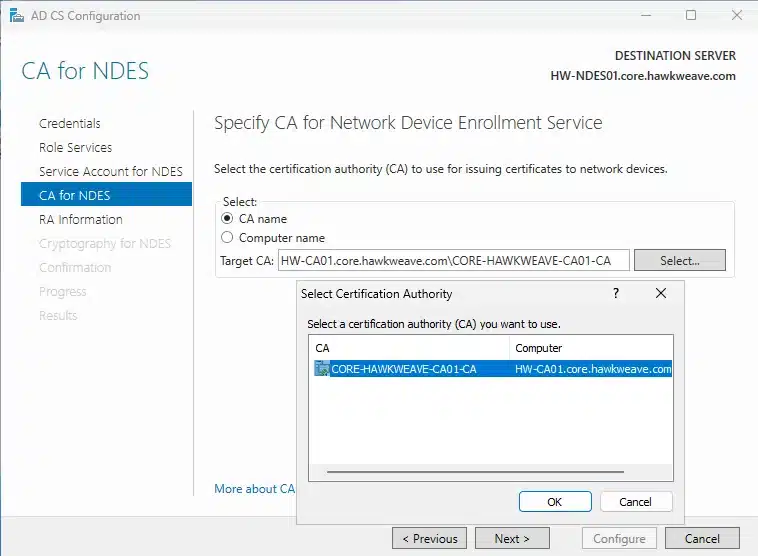
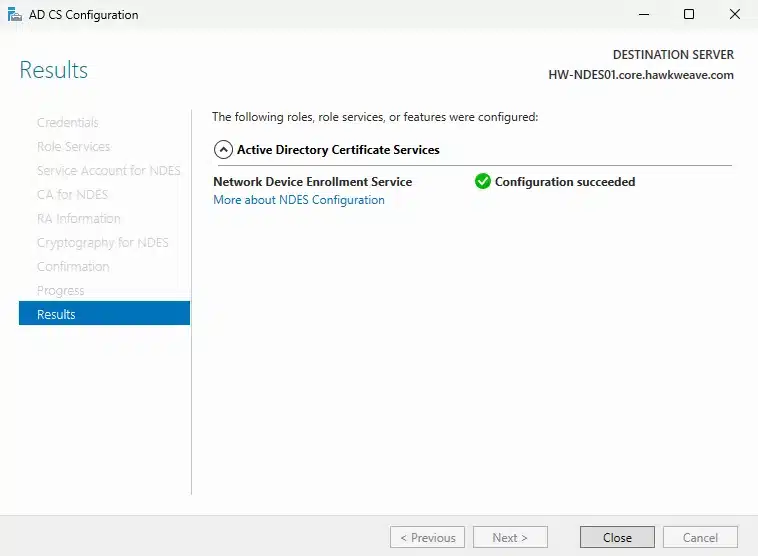
Configuring NDES
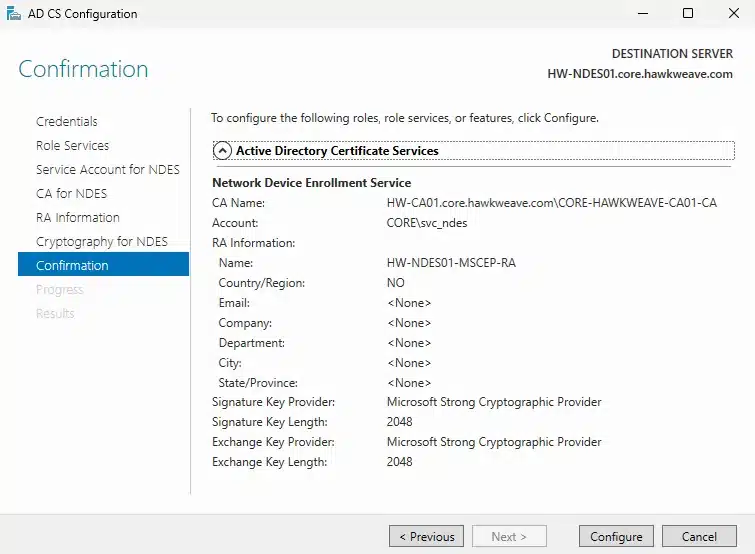
The NDES configuration wizard will prompt for several settings:
- Service Account: Use the CORE\svc_ndes account we created earlier
- CA Configuration: Select CORE-HAWKWEAVE-CA01-CA (our Enterprise CA)
- RA (Registration Authority) Information:
- Country: NO
- Company: Hawkweave
- RA Name: HW-NDES01-MSCEP-RA
- Cryptography Settings:
- Signing: Microsoft Strong Cryptographic Provider, 2048-bit key
- Encryption: Microsoft Strong Cryptographic Provider, 2048-bit key

You can also configure via PowerShell:
# Configure NDES
Install-AdcsNetworkDeviceEnrollmentService `
    -ServiceAccountName "CORE\svc_ndes" `
    -ServiceAccountPassword (ConvertTo-SecureString "YourComplexPassword123!" -AsPlainText -Force) `
    -CAConfig "HW-CA01.core.hawkweave.com\CORE-HAWKWEAVE-CA01-CA" `
    -RAName "HW-NDES01-MSCEP-RA" `
    -RACountry "NO" `
    -RACompany "Hawkweave" `
    -SigningProviderName "Microsoft Strong Cryptographic Provider" `
    -SigningKeyLength 2048 `
    -EncryptionProviderName "Microsoft Strong Cryptographic Provider" `
    -EncryptionKeyLength 2048 `
    -Force
Creating the Web Server Certificate Template (for NDES IIS)
Communications between managed devices and IIS on the NDES server use HTTPS, which requires a certificate.
This is done on the Certificate Authority, HW-CA01, and we’ll create a dedicated template for this:
- Duplicate the “Web Server” template
- Configure with these settings:
General Tab:
- Template display name:
NDES Web Server - Template name:
NDESWebServer
Extensions Tab:
- Application Policies must contain Server Authentication
Subject Name Tab:
- Select “Supply in the request”
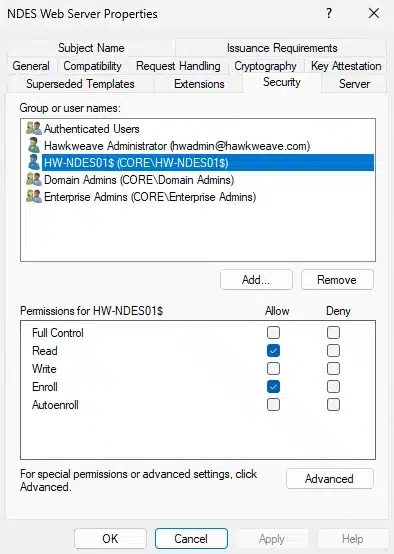
Security Tab:
- Add HW-NDES01$ (the NDES server computer account) with Read and Enroll permissions

Issue the template:
- Right-click Certificate Templates → New → Certificate Template to Issue → Select
NDES Web Server→ OK

Note: The client certificate template mentioned in some documentation is only needed for the legacy NDES connector (NDESConnectorSetup.exe). Since we’re using the modern Certificate Connector for Microsoft Intune, we don’t need it.
Post-NDES Configuration
After NDES is installed, we need to configure the registry to use our certificate template and install certificates for HTTPS.
Configuring Registry for Certificate Template
After the NDES configuration wizard completes, update the registry to use our certificate template:
Via Registry Editor (GUI):
- Open Registry Editor and navigate to:
HKEY_LOCAL_MACHINE\SOFTWARE\Microsoft\Cryptography\MSCEP\ - Based on your certificate template’s Purpose (found on its Request Handling tab), update the corresponding registry values:
- SignatureTemplate: Set to
IntuneSCEPEncryption - EncryptionTemplate: Set to
IntuneSCEPEncryption - GeneralPurposeTemplate: Set to
IntuneSCEPEncryption
- SignatureTemplate: Set to
- Use the certificate template name (not the display name)

Via PowerShell:
# Configure NDES registry to use our certificate template
$ndesconfigPath = "HKLM:\SOFTWARE\Microsoft\Cryptography\MSCEP"
# Set all three to our template name (not display name!)
Set-ItemProperty -Path $ndesconfigPath -Name "GeneralPurposeTemplate" -Value "IntuneSCEPEncryption"
Set-ItemProperty -Path $ndesconfigPath -Name "SignatureTemplate" -Value "IntuneSCEPEncryption"
Set-ItemProperty -Path $ndesconfigPath -Name "EncryptionTemplate" -Value "IntuneSCEPEncryption"
# Verify the registry settings
Get-ItemProperty -Path "HKLM:\SOFTWARE\Microsoft\Cryptography\MSCEP" |
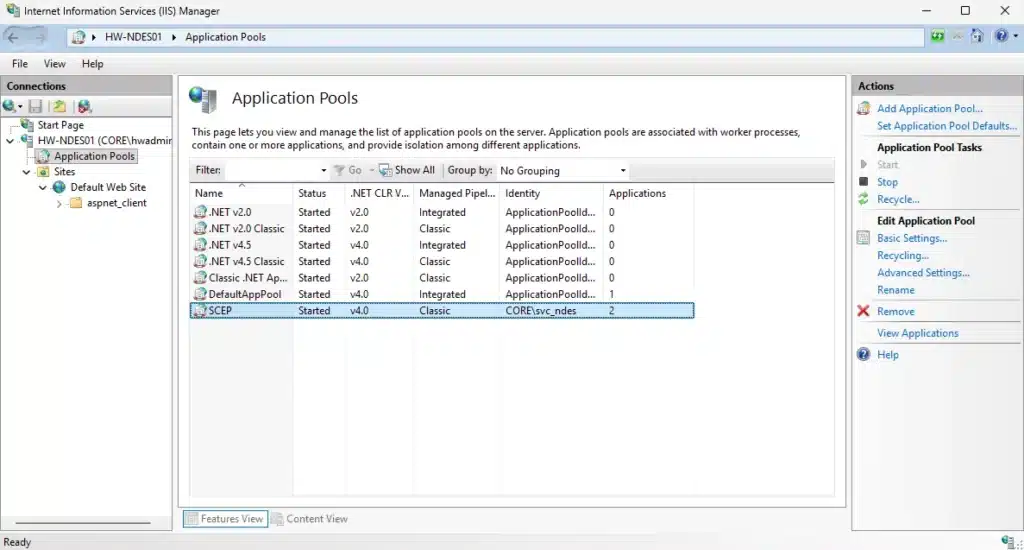
Select-Object GeneralPurposeTemplate, SignatureTemplate, EncryptionTemplateNote: The IIS Application Pool for SCEP should already be configured to use the NDES service account from the configuration wizard. You can verify this in IIS Manager > Application Pools > SCEP > Advanced Settings if needed.
Restart the Server
Important: After making these registry changes, you must restart the entire server. Don’t use iisreset as it doesn’t complete the required changes.
# Restart the server to apply all changes
Restart-Computer -Force
Quick pre-certificate verification of the NDES Service
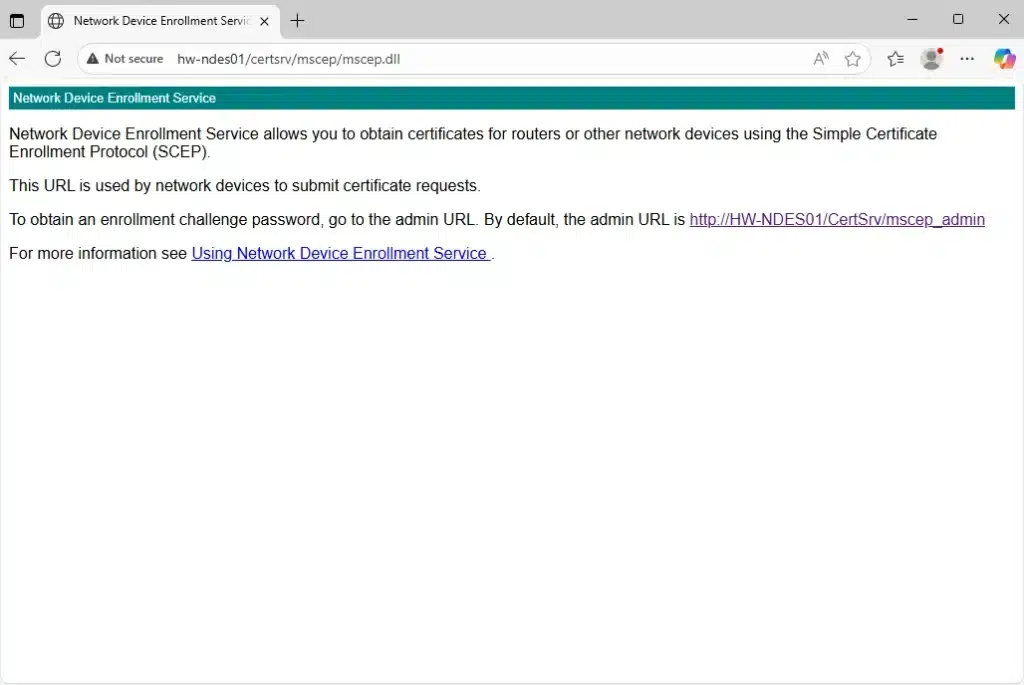
At this point, you should be able to visit http://hw-ndes01/certsrv/mscep/mscep.dll, and see something like this:
Installing Server Authentication Certificate for HTTPS
After the server restarts, we need to install a server authentication certificate for IIS to enable HTTPS:
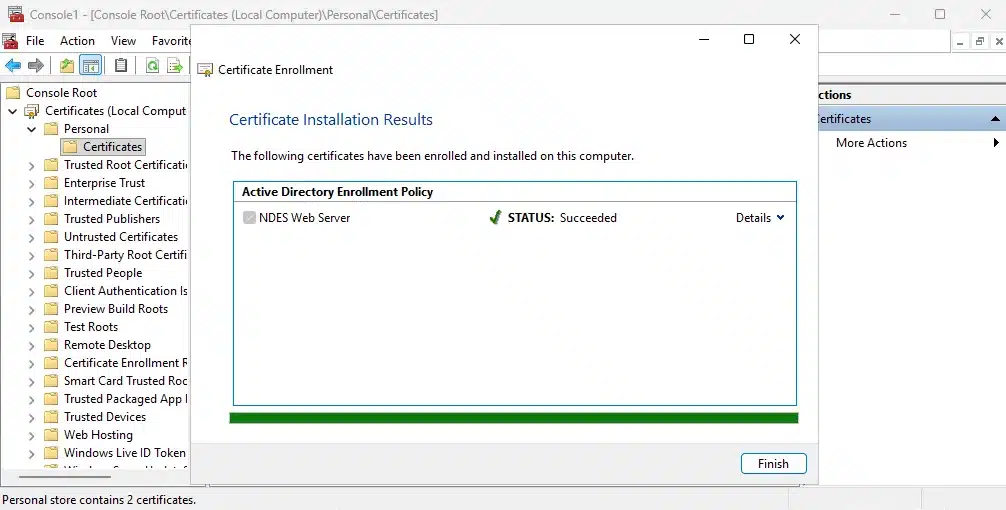
Request the certificate:
- Open MMC and add the Certificates snap-in for Local Computer
- Right-click Personal > All Tasks > Request New Certificate
- Select NDES Web Server template we created earlier
- Configure the certificate:
- Subject Name (CN): HW-NDES01.core.hawkweave.com
- Subject Alternative Names (DNS):
- HW-NDES01.core.hawkweave.com
- HW-NDES01
- localhost
- ndes.core.hawkweave.com
- Complete the enrollment

Bind the certificate in IIS:
- Open IIS Manager
- Select the Default Web Site
- In the Actions pane, click Bindings
- Click Add:
- Type: https
- Port: 443
- SSL certificate: Select the certificate you just enrolled
- Click OK

Via PowerShell (alternative):
# After obtaining the certificate, bind it to IIS
Import-Module WebAdministration

# Get the certificate thumbprint
$cert = Get-ChildItem Cert:\LocalMachine\My |
    Where-Object {$_.Subject -like "*HW-NDES01*" -and $_.EnhancedKeyUsageList.FriendlyName -contains "Server Authentication"}

# Create HTTPS binding
New-WebBinding -Name "Default Web Site" -Protocol https -Port 443

# Bind the certificate
$binding = Get-WebBinding -Name "Default Web Site" -Protocol https
$binding.AddSslCertificate($cert.Thumbprint, "My")
Note: Since we’re using Microsoft Entra Application Proxy (not exposing NDES directly), we only need the internal FQDNs in the certificate. The Application Proxy will handle the external URL and SSL termination.
Testing NDES (Pre-Intune Connector)
Let’s verify NDES is working before we add the Intune Certificate Connector in the next article. I’ll use the built-in Edge browser to test the various endpoints.
Testing via Edge Browser:
- Test the SCEP endpoint:
- Open Microsoft Edge
- Navigate to:
https://hw-ndes01/certsrv/mscep/mscep.dll - You should see a “Network Device Enrollment Service” page
- This confirms IIS and NDES are responding correctly
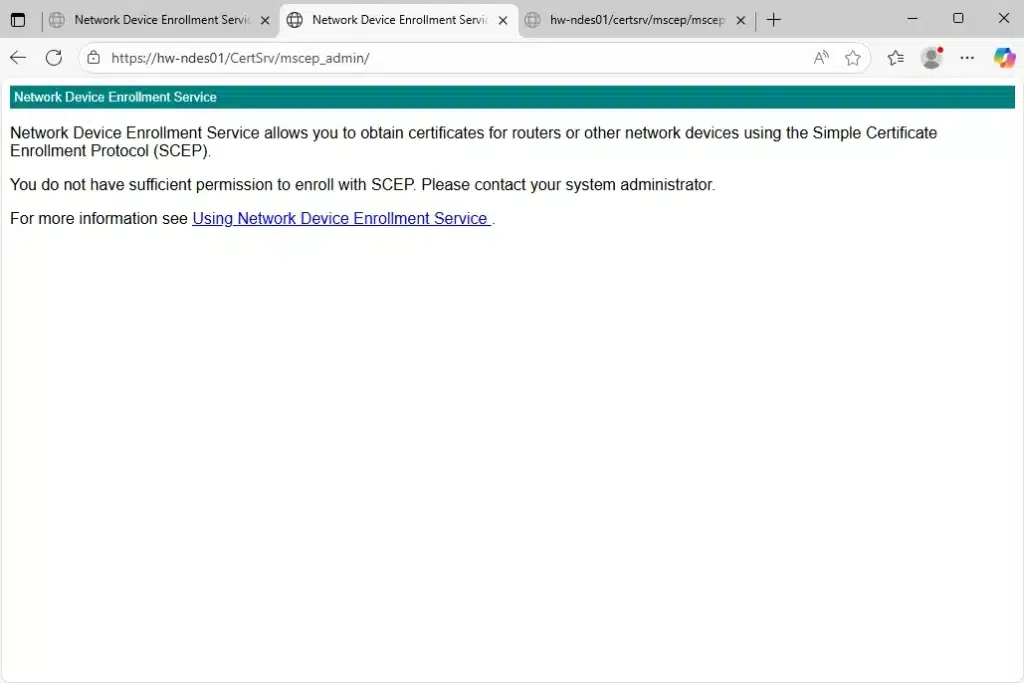
- Test the NDES Admin page:
- Navigate to:
https://hw-ndes01/certsrv/mscep_admin - You’ll see the NDES administration page
- Note: You may see “You do not have sufficient permission to enroll with SCEP” – this is normal when accessing as an admin user
- This page allows you to generate one-time enrollment passwords for testing SCEP manually
- Navigate to:
- Verify SCEP capabilities:
- Navigate to:
https://hw-ndes01/certsrv/mscep/mscep.dll?operation=GetCACaps - You should see text output showing the SCEP capabilities
- Expected output:
- Navigate to:
     POSTPKIOperation
     Renewal
     SHA-512
     SHA-256
     SHA-1
     DES3

Testing via PowerShell (alternative method):
# Test from the NDES server itself
$testUrl = "http://localhost/certsrv/mscep/mscep.dll"
Invoke-WebRequest -Uri $testUrl -UseBasicParsing
# You should see StatusCode: 200 (OK)
# This confirms NDES is responding properly
# Test the admin page
$adminUrl = "http://localhost/certsrv/mscep_admin"
Start-Process $adminUrl
# This opens the NDES admin page in your default browser
# The "insufficient permission" message is normal for admin users
# Verify SCEP capabilities (what Intune will check)
$scepUrl = "http://HW-NDES01/certsrv/mscep/mscep.dll?operation=GetCACaps"
$response = Invoke-WebRequest -Uri $scepUrl -UseBasicParsing
$response.Content
# Should return: POSTPKIOperation, Renewal, SHA-512, SHA-256, SHA-1, DES3
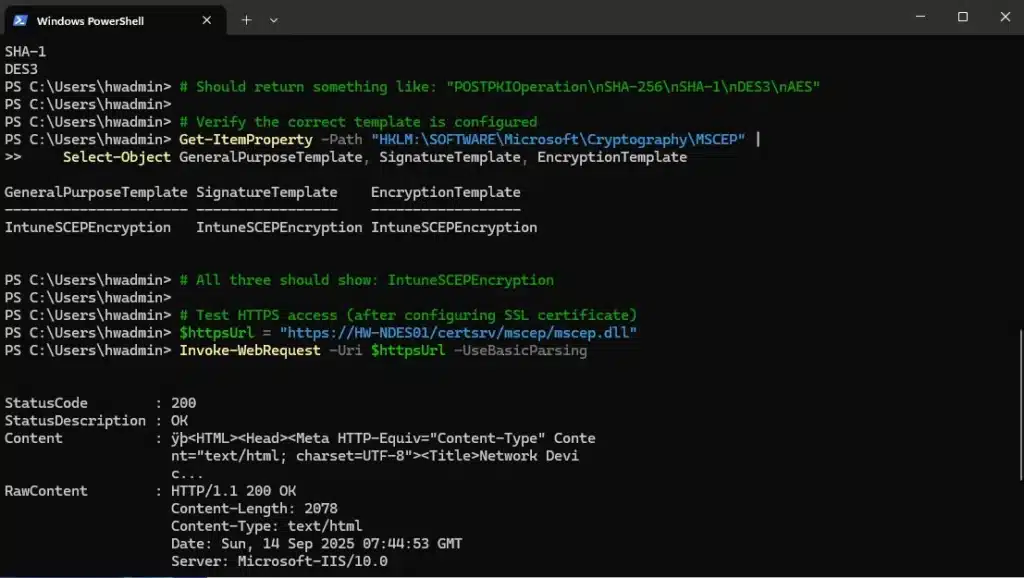
# Verify the correct template is configured
Get-ItemProperty -Path "HKLM:\SOFTWARE\Microsoft\Cryptography\MSCEP" |
Select-Object GeneralPurposeTemplate, SignatureTemplate, EncryptionTemplate
# All three should show: IntuneSCEPEncryption
# Test HTTPS access (after configuring SSL certificate)
$httpsUrl = "https://HW-NDES01/certsrv/mscep/mscep.dll"
Invoke-WebRequest -Uri $httpsUrl -UseBasicParsing
# Should also return StatusCode: 200What you should see:
- StatusCode 200 from the SCEP endpoint means NDES is working correctly
- The admin page showing “insufficient permission” for admin users is normal – it’s designed for the NDES service account
- The GetCACaps operation confirming crypto capabilities including SHA-512, SHA-256, etc.
- All tests should work over both HTTP and HTTPS with the same results
Pre-staging for Microsoft Entra Application Proxy
Since we’ll be using Microsoft Entra Application Proxy to securely publish NDES, let’s prepare for that. In a lab environment, we can install the Application Proxy connector on the same server as NDES to save resources:
# The Application Proxy connector can be installed on the NDES server for lab environments
# This saves a VM while still demonstrating the functionality

# On the NDES server, ensure these are configured:
# 1. Windows Authentication enabled in IIS
# 2. SPNs registered for the NDES service account

# Register SPNs for NDES (run on domain controller)
setspn -s http/HW-NDES01 CORE\svc_ndes
setspn -s http/HW-NDES01.core.hawkweave.com CORE\svc_ndes
setspn -s http/ndes.core.hawkweave.com CORE\svc_ndes

# Verify SPNs are registered
setspn -L CORE\svc_ndes
Secure External Access Strategy
Since our NDES server needs to be accessible from Microsoft Intune cloud services, we need to plan for secure external access. However, we’re NOT going to expose it directly through port forwarding – that would be a security risk!
Why Microsoft Entra Application Proxy Instead
Instead of port forwarding through pfSense, we’ll use Microsoft Entra Application Proxy in the next article. Here’s why this is the better approach:
- Zero inbound ports: The connector makes outbound connections only – no firewall holes needed
- Azure AD authentication: Additional layer of security with conditional access policies
- No direct internet exposure: NDES remains completely internal while still accessible to Intune
- Encrypted tunnel: All traffic flows through Microsoft’s secure infrastructure
- Logging and monitoring: Full visibility in Microsoft Entra admin center
- Purpose-built for web apps: Application Proxy is specifically designed for publishing web applications like NDES
For now, we’ll keep NDES completely internal. In Part 3, we’ll install the Application Proxy on the NDES server to securely publish NDES for Intune access.
Troubleshooting Common Issues
NDES Won’t Start
If NDES service fails to start:
# Check Event Viewer
Get-EventLog -LogName System -Source "NDES" -Newest 10

# Verify service account permissions
# The svc_ndes account needs:
# - Log on as a service right
# - Read permissions on the RA certificates
# - Enroll permission on the SCEP certificate template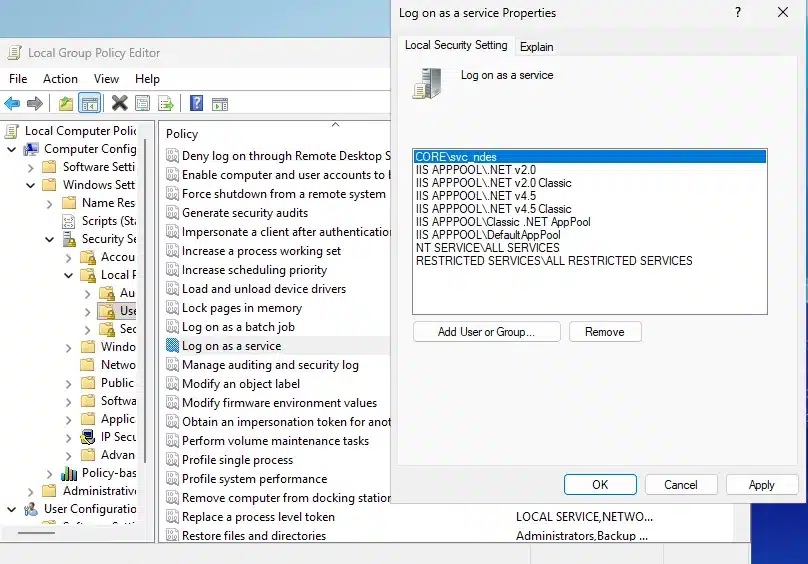
Certificate Template Not Available
If certificate templates don’t appear:
# Force AD replication
repadmin /syncall /AdeP

# Restart Certificate Services
Restart-Service CertSvc -Force

# Re-publish templates
certutil -pulse
IIS Issues with NDES
If you get 500 errors from NDES:
# Check IIS configuration
Get-WebApplication -Site "Default Web Site" -Name "CertSrv*"

# Verify .NET Framework
Get-WindowsFeature -Name NET-Framework-45-Features

# Check application pool identity
Get-ItemProperty -Path "IIS:\AppPools\SCEP" -Name processIdentity
NDES HTTP 500 Error After Reboot
If NDES returns HTTP Error 500 after a server restart with Event ID mentioning “cannot retrieve one of its required certificates (0x80070057)”, the NDES service account has likely lost access to the RA certificates’ private keys.
Fix via GUI:
- Open MMC → Add Certificates snap-in (Local Computer)
- Navigate to Personal → Certificates
- Find both HW-NDES01-MSCEP-RA certificates
- For each: Right-click → All Tasks → Manage Private Keys
- Add “CORE\svc_ndes” with Read permissions
- Open IIS Manager → Application Pools
- Right-click SCEP pool → Recycle
The error occurs because Windows sometimes resets private key permissions after updates or reboots, preventing the NDES service account from accessing its RA certificates.
Certificate Binding Issues
If you’re getting certificate errors when accessing HTTPS:
# Verify what's in your certificate
$cert = Get-ChildItem Cert:\LocalMachine\My | Where-Object {$_.Subject -like "*NDES*"} | Select-Object -First 1
Write-Host "Subject: $($cert.Subject)"
Write-Host "DNS Names in Certificate:"
$cert.DnsNameList | ForEach-Object { Write-Host "  - $_" }

# Check DNS resolution
nslookup HW-NDES01
nslookup HW-NDES01.core.hawkweave.com
Security Hardening
For a production environment (or even a more realistic lab), consider these security improvements:
CA Security
# Restrict CA permissions
# Remove "Everyone" from certificate template permissions
# Add specific groups only as needed

# Enable auditing
auditpol /set /subcategory:"Certification Services" /success:enable /failure:enable

# Configure CA for CRL checking
certutil -setreg CA\CRLFlags +CRLF_REVCHECK_IGNORE_OFFLINE
NDES Security
# Configure NDES for HTTPS only
# Install a web server certificate
# Configure IIS to require SSL

# Limit SCEP challenge validity
Set-ItemProperty -Path "HKLM:\SOFTWARE\Microsoft\Cryptography\MSCEP" `
    -Name "PasswordValidity" -Value 60  # Minutes

# Set maximum password uses
Set-ItemProperty -Path "HKLM:\SOFTWARE\Microsoft\Cryptography\MSCEP" `
    -Name "PasswordMax" -Value 1
What’s Next: Secure Cloud Integration
With our PKI infrastructure in place, we’re ready for the next phase which I’ll cover in the upcoming articles:
Part 3 Preview: Intune Certificate Connector & Secure Publishing
- Installing Microsoft Entra Application Proxy connector on NDES server to securely publish it
- Configuring pass-through authentication for SCEP requests
- Installing the Intune Certificate Connector on our NDES server
- Configuring SCEP profiles in Microsoft Intune
- Testing certificate deployment to Intune-managed Windows 11 clients
- Troubleshooting both connectors working together
Part 4 Preview: Cisco ISE Integration
- Configuring Cisco ISE to trust our Enterprise CA
- Setting up 802.1X authentication policies using certificates
- Creating authorization profiles based on certificate attributes
- Testing Wi-Fi authentication with certificate-based EAP-TLS
- Conditional Access scenarios combining Intune compliance and ISE
The beauty of using Microsoft Entra Application Proxy is that our NDES server remains completely internal – no firewall holes, no port forwarding, no direct internet exposure. The Application Proxy connector creates a secure outbound-only tunnel that Microsoft Intune can use to reach our NDES server for certificate enrollment.
Quick Reference: Lab Infrastructure Status
| Server | IP Address | Role | Status | Next Step |
| HAWKWEAVE-FIREWALL | 10.50.50.1 | pfSense Gateway | ✅ Complete | Configure for ISE RADIUS |
| HAWKWEAVE-DC01 | 10.50.50.10 | Domain Controller, DNS, DHCP | ✅ Complete | – |
| HAWKWEAVE-CA01 | 10.50.50.20 | Enterprise Root CA | ✅ Complete | Monitor certificate issuance |
| HAWKWEAVE-NDES01 | 10.50.50.30 | NDES/SCEP Server | ✅ Complete | Install Intune & Entra Connectors |
| HAWKWEAVE-CLIENT01 | DHCP | Windows 11 LTSC Test Client | ✅ Complete | Join to Intune |
| HAWKWEAVE-CLIENT02 | DHCP | Windows 11 LTSC Test Client | ✅ Complete | Join to Intune |
Closing Thoughts
Building out this PKI infrastructure might seem like overkill for a lab, but it’s incredibly valuable for understanding how enterprise certificate services actually work in hybrid scenarios. The combination of on-premises PKI with cloud-delivered certificates via Intune is exactly how organizations are implementing zero-trust today.
By building this from scratch, you understand the relationships between CAs, NDES, templates, and enrollment processes. This knowledge becomes invaluable when you’re troubleshooting why an Intune-deployed certificate isn’t working with Cisco ISE, or when you need to design certificate-based authentication solutions that work across cloud and on-premises resources.
The beauty of this setup is that it mirrors real enterprise deployments. Companies aren’t ripping out their PKI infrastructure – they’re extending it to the cloud with tools like the Intune Certificate Connector. And with Cisco ISE validating these certificates for network access, you have a complete zero-trust story.
Have you implemented certificate-based authentication with Intune and ISE? What challenges did you face with the Certificate Connector or SCEP profiles? I’d love to hear about your experiences, especially if you’ve had to troubleshoot certificate deployment issues in production!